Tuesday 30 October 2018

I've invented the S pin


Well, that was tricky.

I'm beginning to think that restoring a rocking horse properly is a workout for the brain - you come across so many problems you weren't expecting, to which you have to devise solutions.

Today I secured the ends of the swing irons and nailed on the brass bowler hats. I'd bought split pins to go through the holes at the ends of the irons, then realized because of their large heads the bowler hats would not fit on top. (I also had to file down a couple of the ends and washers a smidge for the same reason.) What to do? I cut lengths of wire coat hanger, long so I'd be able to pull on them. I annealed the rods, bent them to an S shape through the holes and cut them to size.

These worked perfectly. Perhaps I could patent them and become a millionaire?

 I used tiny brass tacks to nail on the bowler hats. They were quite stroppy, over-compensating for their small size no doubt.

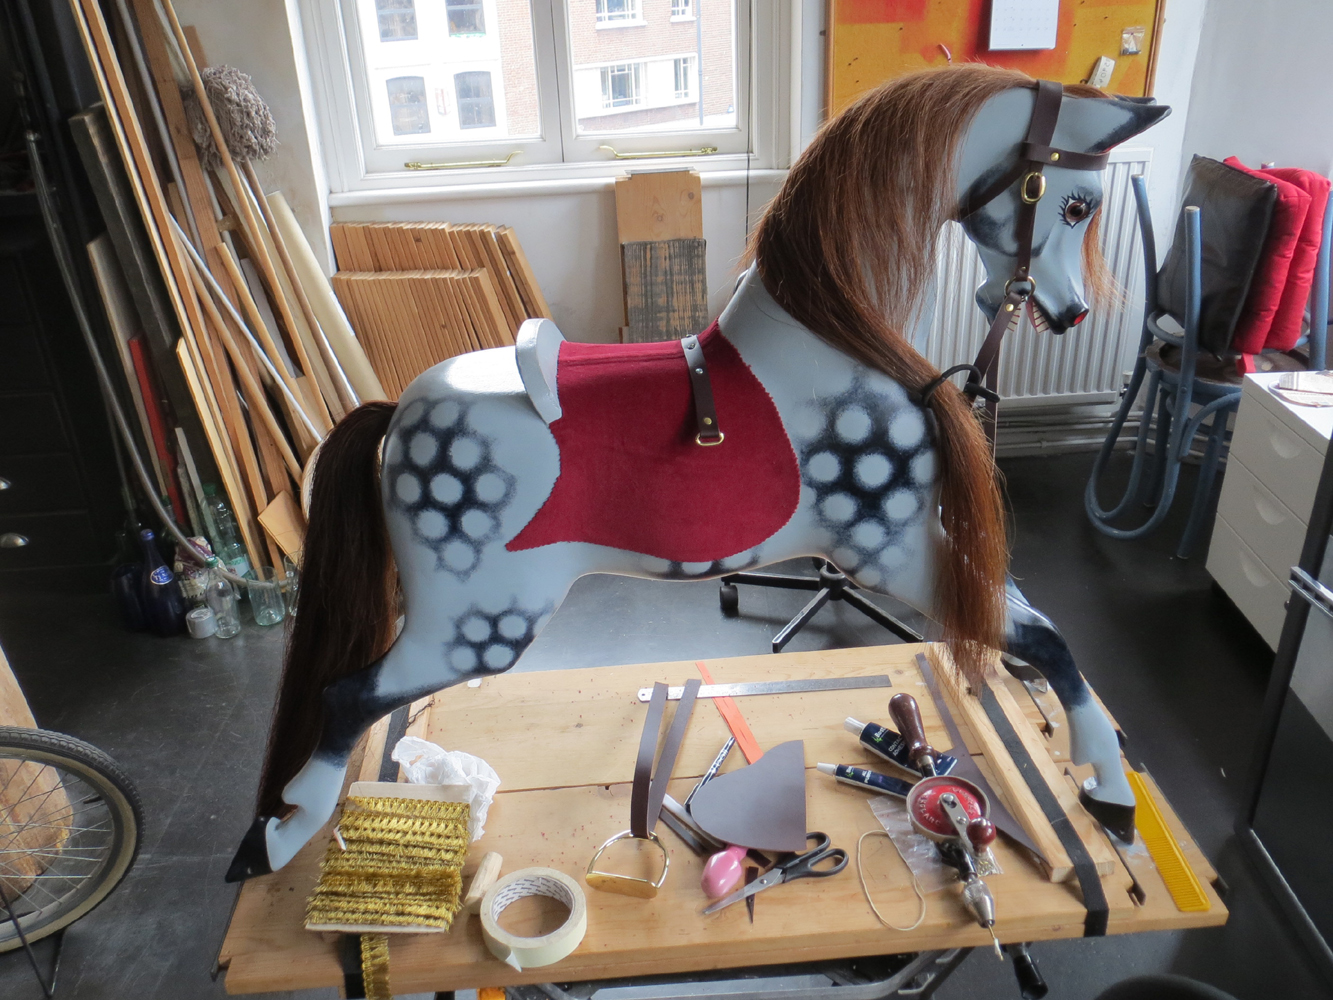
Zaphod is now finished, hurrah! I haven't yet bolted his hooves to the hoof rail - I'll have to take him home in two trips as my elderly Micra isn't quite large enough to transport him on his stand.


Thursday 25 October 2018

Brass bowler hats

These are used to cover the ends of the swing irons where they poke through the hoof rail. I suspect Zaphod didn't have them originally, as I can't find any screw/tack marks, but split pins and washers look a bit unfinished when the rest of him is all shiny and new.

For some reason, you can only buy brass bowler hats in one size, 45mm. This is too big for a medium size horse - that's the size that Oliver, the extra-large Stevensons Brothers horse I bought for my daughter when she was small has. So, being a jeweller, I made my own 38mm ones from brass sheet. First I milled it down to 0.4mm thick, cut it into squares, annealed them and tapped them into a doming block. I had to anneal them three times. Then I pierced out a circle, polished them, and drilled three holes in each. They aren't perfectly regular, but will look fine.


Tuesday 23 October 2018

Making a rosette

Now this surprised me - I'm good with my hands, and thought making a rosette from ribbon would be a piece of cake. Wrong. Turned out it's really difficult to get it neat, symmetrical and the right size. After a couple of goes I looked on Google for help, but failed to find instructions for the right kind of rosette. Martha Stewart's were particularly vague and unhelpful.

In the end I found instructions on how to sew a flounce, and adapted it by ironing box pleats into a 15mm ribbon (using a slip of 8mm card as a guide), hand sewing the edge and then glueing the ends together. You seal the raw edges to stop them unravelling by carefully running a lighter flame along them. I glued the finished rosette to a leather disc.

It's important to use good quality ribbon. Mine was from John Lewis a decade ago. Cheap ribbon is too soft and loose-woven.


I made six pleats to go with the six petals of the brass florette that goes in the centre. It's nailed on to Zaphod's neckstrap with a domed brass nail. If I'd made him a nailed on bridle, he'd have had a smaller rosette on that to match.

Thursday 18 October 2018

Saddle and sundries

When restoring a rocking horse you have to make hundreds of small decisions along the way as to how you are going to do it. As a jeweller, I'm obsessive about minor details and like to get things right. But sometimes you just can't find a photo of a similar horse in original condition, and you have to plump for one thing or another. The gold fringe, for instance, is possibly more Ayres than J & G Lines - but I couldn't resist the way it looks.

Here are some photos of the process, to show how I made the saddle. I used a staple gun, which was very handy, two types of Bostic and domed upholstery nails. I stitched the saddle on an ordinary sewing machine using a new needle - it only worked if I used the leather forming the underside of the saddle suede side up, as the other side wouldn't feed through the machine. It's stuffed with horse hair which I believe is traditional. I cut the thick leather on a cutting mat with a stanley knife, and used scissors on the soft leather.

The tail strap was surprisingly easy and quick to make. Everything else took ages.

I made paper then fabric patterns of the saddle first

I glued on the velvet saddle cloth, smoothing it out as I went.
The strap, screwed in with three screws, is to hold the stirrup leathers.
The saddle is made of soft leather, stuffed with horsehair and staple gunned to the horse.


These are the saddle flaps, with decorative trim glued on.

The finished (almost) saddle, with decorative rondel.
I still have to shorten the stirrup leathers and put a couple more studs in the saddle flaps.

Saturday 6 October 2018

Zaphod's tack

I'm lucky to have a brilliant leather and metal sundries shop near me in Islington, J.T. Batchelor Ltd, in a Victorian building in a narrow mews. I went there to buy leather and buckles for Zaphod's tack. I found this hide in Havana Brown, with matching soft leather for the padded saddle.

I also bought some brass buckles, stud rivets and link pieces.

I've ordered solid brass stirrups from Wirral Rocking Horses. I must say the brown and brass go beautifully together.


Zaphod would have had a nailed on bridle, and perhaps that's what I should have made him - but for now at any rate he has a removable one.


Mane and tail

Zaphod had a brown mane and tail (I know as I found two bits inside his body cavity) so that's the colour I used. These are cured horse tails, which you soak overnight to soften the hide, and cut to size from the hide side with a stanley knife. You then nail the mane to the neck, with a separate bit for the forelock, and allow to dry. The bridle will cover the join. Some horses have a groove so you don't see the hide on the left side - rocking horses' manes traditionally fall to the right - but I didn't carve Zaphod one. I don't know if he would have had a groove originally.


I forgot to mention that I gave Zaphod three coats of satin acrylic varnish. I chose this after some thought rather than an oil-based varnish as it won't go yellow.